
Cover image: AI-generated editorial concept; not a customer project or production proof.
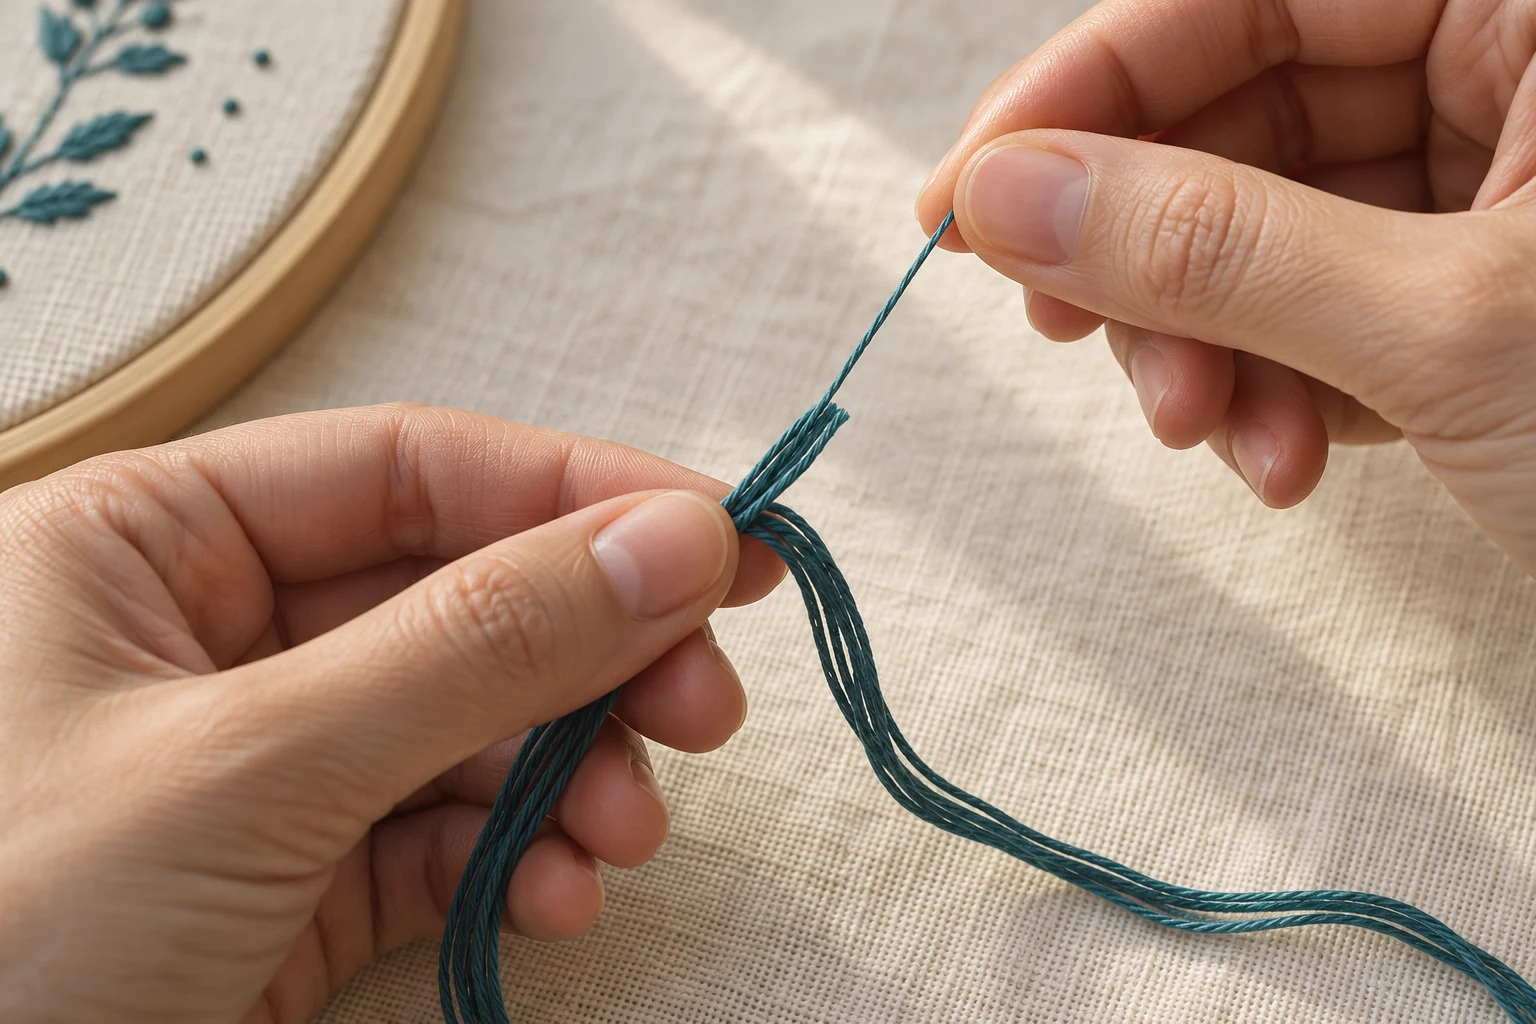
To separate embroidery floss, cut a manageable length, hold it loosely near one end and pull out one strand straight upward. Repeat, then bring together the number of strands your pattern requires. This is the basic method described in DMC’s stranded-thread guide.
For ordinary hand embroidery, prepare a short length at a time. If you need long three-strand lengths for punch needle work, the optional swivel method below offers a different approach.
Check that your thread can be separated
Six-strand embroidery floss contains six strands that you can separate and recombine. Check the thread type on the label before starting; the brand name or color number alone does not identify its construction.
Pearl cotton, also called perle cotton, should remain intact. DMC describes its pearl cotton as non-divisible. For specialty threads, follow the manufacturer’s preparation instructions rather than assuming they behave like stranded cotton.
Choose how many strands to use

AI-generated material illustration of loose embroidery floss. Use the table and your pattern to choose the strand count.
Start with the strand count specified in your pattern. For your own design, stitch a small sample on the intended fabric and compare the coverage before committing to a larger area.
Strand count | Effect to assess in your sample |
|---|---|
1 | Fine lines and small details. |
2–3 | More visible lines and moderate coverage. |
4–6 | Thicker lines and fuller coverage. |
These are starting points, not fixed rules for particular stitches. Fabric, stitch size and the appearance you want all matter. DMC explains how changing the strand count changes the thickness of your embroidery in its guide to using stranded floss.
For a three-strand working thread, remove three individual strands and then align them together. Separating and recombining the strands helps them lie alongside one another; Mary Corbet demonstrates this in her floss-separation tutorial.
Gather your supplies

AI-generated illustration of basic floss-preparation supplies.
For short lengths, gather divisible embroidery floss, sharp embroidery scissors and a clean surface where you can lay the separated strands. A ruler is useful while you learn a comfortable working length.
Keep a labeled bobbin or thread card nearby for unused strands. A fishing swivel and string are optional supplies for the longer-length method; you do not need them for ordinary strand separation.
Separate a short length step by step
Cut your working length. Start with about 18 inches (46 cm), shortening it if you find it awkward to manage.
Expose the ends. Hold the floss loosely near one cut end and tap the tip so the individual strands spread slightly.
Select one strand. Grip its tip with your other hand and draw it straight upward. Let the remaining bundle hang freely below your holding fingers.
Let the bundle gather. The other strands may bunch beneath your fingers as the selected strand slides out. Keep your grip relaxed and continue gently.
Straighten and repeat. Once the strand is free, smooth the remaining bundle before removing another.
Recombine your working strands. Lay the required strands side by side, align their ends and thread your needle.
DMC’s preparation instructions show the upward pull and recombination. Mary Corbet’s illustrated demonstration shows how the remaining bundle gathers during extraction.
Fix tangles without pulling harder
If the floss stops sliding, pause and release the tension. Straighten the loose bundle and check whether you accidentally caught more than one strand. Avoid pulling two groups sideways apart when preparing a short working length.
If a loop begins tightening, gently loosen it before continuing. For the next attempt, use a shorter length and keep the hanging ends clear of your supplies. Mary Corbet discusses the value of extracting strands individually in Floss Pulling—One Strand at a Time.
Optional swivel method for longer punch needle lengths
When your punch needle and pattern call for three strands, you may want to divide a longer six-strand length into two bundles. DoodleDog Primitives demonstrates a whole-skein separation method using a fishing swivel.
Tie string to one end of a freely rotating swivel. Make a loop at the other end of the string and secure it around a stable knob.
Attach one end of the floss to the swivel and lay the unwound length along a clean, clear space.
At the free end, divide the floss into two groups of three. The demonstrator starts about 6–8 inches (15–20 cm) in from that end.
Gently spread the groups while moving toward the swivel, allowing it to rotate as the twist releases.
Untie or trim the attached end, then wind each separated bundle onto a bobbin or spool.
Try a shorter length before preparing a whole skein. This method serves a specific long-length workflow; follow your punch needle’s instructions when choosing thread and strand count. Stop if the swivel sticks or the floss snags.
Keep unused strands ready for the next session
Wind leftover strands loosely onto a bobbin or keep them on a thread card. Record the brand, thread type, color number and remaining strand count so you can identify them later.
For organizing the rest of your collection, see our embroidery floss storage guide.
Frequently asked questions
Can I pull out two or three strands at once?
For short hand-embroidery lengths, remove them individually and recombine them. Save the two-bundle swivel approach for the longer punch needle workflow described above.
Why does the remaining floss bunch up?
Some gathering is normal while a strand slides out. Keep a loose grip and straighten the bundle afterward. If it locks into a knot, stop and loosen it instead of increasing the pull.
Do I always need three strands?
No. Use the count your pattern specifies, or compare samples for your own design. Three strands are one option, not a universal requirement.
Does this work with every brand?
The method applies to divisible stranded floss. Check the construction of the specific product; pearl cotton and other non-divisible threads should remain intact.
Practical details for How to Separate Embroidery Floss for Smooth, Even Stitches
Use the article above as a starting point, then make the production brief specific to your own design. A stitch file is made for a finished size and material, so the artwork alone is only part of the instruction.
Work through these points in order and keep the answers with the artwork or production request. A short written brief makes it easier to compare a proof with the intended result, ask a useful follow-up question and avoid relying on assumptions made from a screen image alone.
The aim is not to add unnecessary steps. It is to identify the choices that change the final result before work begins. If a requirement is unknown, flag it for confirmation rather than guessing; that keeps the approval process focused on the design, material and use that apply to this particular project. Save the approved brief with the project files for future reorders or revisions.
Confirm the finished use
State the item, placement and finished width and height. A chest logo, cap front and jacket back do not use the same sewing area, even when they start from the same artwork.
Protect the smallest details
Review small lettering, narrow gaps, thin outlines and tiny colour changes at the final size. Simplifying a fragile detail before digitizing is often more reliable than trying to force it into a small sew-out.
Match the file to the machine
Tell the production team the embroidery machine or format required, along with the fabric or garment type. This lets them prepare the right export and make choices that suit the material rather than treating every job alike.
Quick questions to check before you proceed
What should I send with my artwork?
Send the clearest original available, the finished dimensions, placement, fabric or garment type and the required machine format if you know it.
Can the same file be used at every size?
Not always. Scaling changes the relationship between stitch length, detail and fabric, so a design may need review when the finished size or placement changes.
What should I check before production?
Confirm the spelling, colours, final size, placement and any details that must remain readable. A proof or sample is the best point to catch a change.